Sat near the back of an auditorium during a slideshow of commended photographs, I watched the front rows mutter seemingly bitter critique while holding fingers in ‘L’ shapes to the screen, before the winner’s names were announced - “and the winner of the Photographer’s Award for Black and White Print is… Daniel Guerin.” I smiled but I kept quiet. “Never heard of him” muttered one, “must be from one of the lesser clubs” muttered another.
It was 15 or 16 years ago when my name was engraved on the prestigious silver plate of the Guernsey Eisteddfod Society competition - my first and last entry. I’ve never been a member of a photographic club - mainly due my social anxiety but also partly because the snobbery I witnessed from those few on that night. I’d proved something to myself but I never felt comfortable with competitive photography.
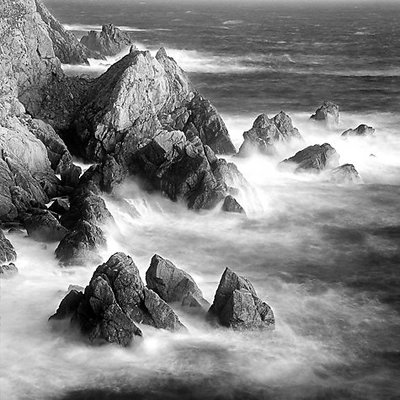
It was an interesting time - I was shooting 35mm film but scanning it and processing in Photoshop - a hybrid method that seemingly didn’t sit well with the purists. Digital cameras existed but for a while, a well-scanned transparency beat affordable digital sensors hands-down. The photo that won the award was such; a square-cropped scanned slide of Fuji Velvia, converted to black and white. Sadly, I disposed of all my film-based photographs in a rush to clear-out before travelling, wrongly assuming that anything good was scanned and securely backed up. I have however, managed to find a poor-quality version of the image online and this is it!

I have for a long time intended to return and re-shoot the same image on current digital equipment, and to process it as close-to the original as possible but with modern software and far greater competency. I've visited the site several times over the years but only now have all the conditions conspired to somewhat match those of 15 years ago.
I hadn’t yet found the low-res version of the original image and my recollection of the correct shooting location was hazy. The route down a steep slope on the cliffs at Les Tielles is a little risky, so I won't recommend trying it. I certainly wouldn’t recommend the spot I chose on day-one, perched on a foot-wide slippery ledge over rocks and giant breaking waves while strong winds and heavy hail battered me. The shower did clear but the sunlight never came. That night I found the original photo and compared it to the day's shots - it was nice, but it was the wrong place.
The following day, conditions were looking good - the wind was still quite strong, the sea-state not quite so rough and the sky was similar, with sporadic heavy showers. I didn’t need an interesting sky because it doesn't appear in the photo, but I did need raking sunlight and there was a reasonable chance of that between showers. A cloud-free sky would have worked but there is a certain quality to light shaped by heavy clouds flanking it that can make a photograph really special. Today was my last chance because by tomorrow the tide would be unacceptably low.
With the original image on my phone, I could compare it to the scene and find the right location, which thankfully was far less dangerous than the spot I had chosen the previous day. According to the limited information available, I had used an 80-320 zoom lens, which must have been at the wide end so, allowing for the crop-factor of my current camera, 50mm would be just about perfect. I was keen to use a prime lens for ultimate image quality, which meant either a 35mm or a 56mm. Given that I knew I had to crop the image square, the 35mm gave plenty of room to play with but would require significant vertical cropping to achieve the same field of view as the original. I experimented with both, but decided to move back as far as I could with the much tighter 56. I set a square preview on the camera which aided composition immensely and using a monochrome film simulation, I was able to view the scene in black and white so that I could nail exposure almost perfectly, whilst knowing I still had a full raw file to work from in edit. Perfect exposure was imperative as the contrast between the bright whites of the crashing waves and the deep shadows in the rocks left no room for error.
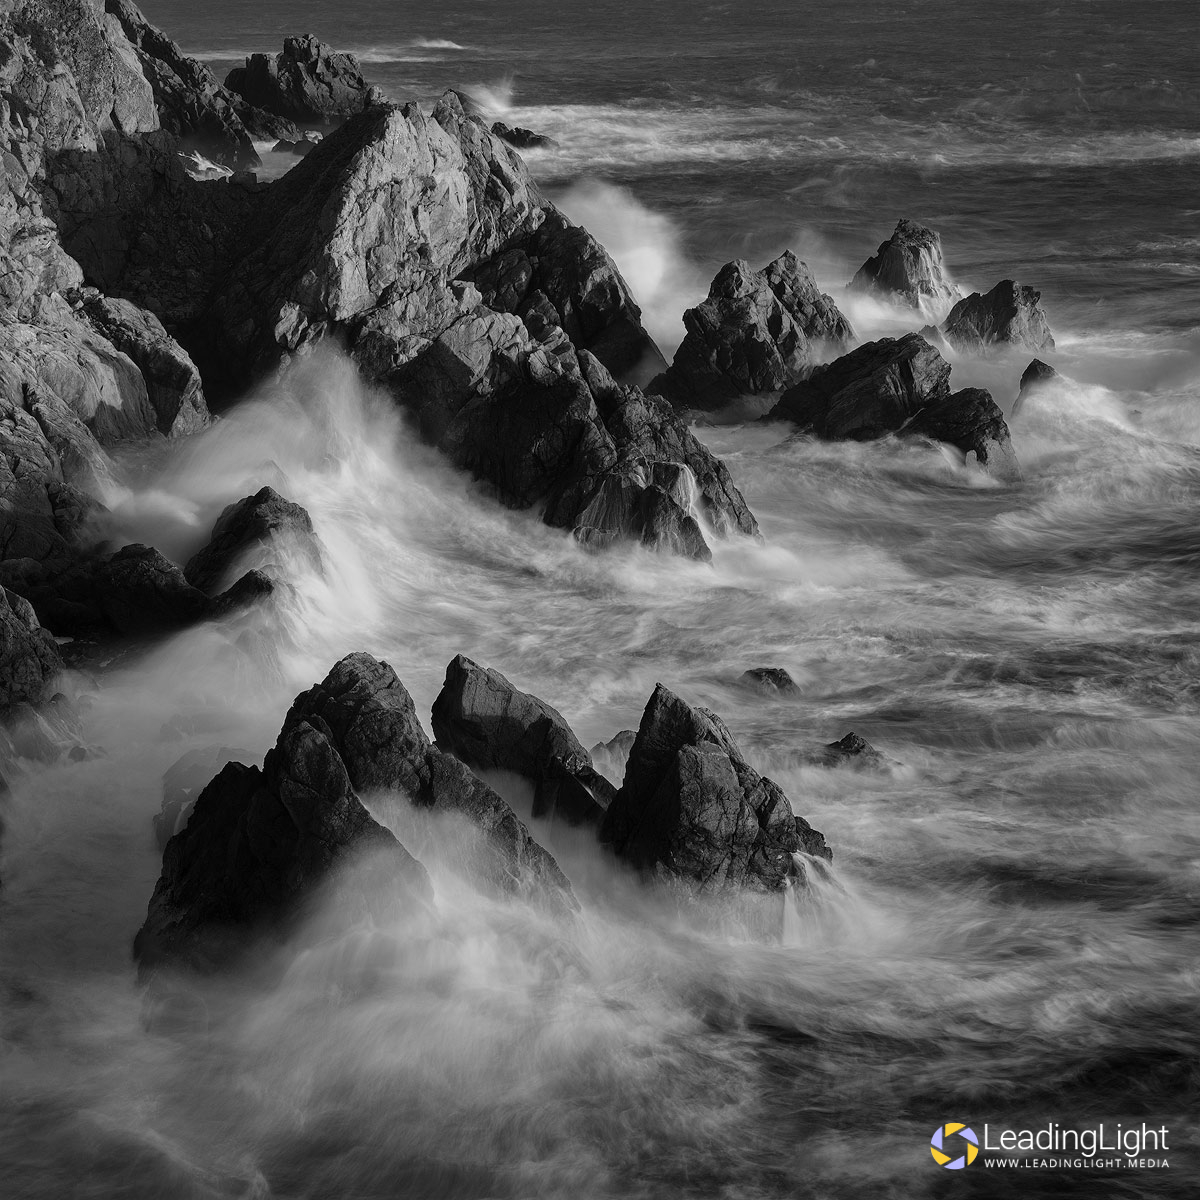
Shutter speed was key to capturing the correct amount of movement in the water. The original was shot on ISO-50 film but my current camera is only capable of ISO-160, making it impossible to achieve a long-enough shutter speed without closing the lens aperture beyond a point that image-quality begins to suffer. Instead I used a variable neutral-density filter in front of the lens which allowed me to find a suitable speed and then dial the filter until exposure was spot-on. I'd stated a shutter-speed on the original photo of 1/30 but it was obvious that this was much too fast to capture that amount of blur in the water, which would actually have required several seconds, I guessed. In fact it was impossible to recreate the exact same effect, I assume, because the sea was much rougher than when I was first here. I decided to shoot what felt right for the scene than to risk missing the shot by trying to be entirely faithful to the original.
As is usual for a landscape photographer in winter, I sat through yet another heavy shower, causing my fingers and toes to numb, before the low afternoon sun made brief but stunning appearances in all its dramatic glory. I worked quickly to find appropriate settings while the scene was bathed in sunlight but I also wanted to wait for the the tide to rise as close to that in the original photo as was possible. It didn’t quite get there, so I shot as large waves crashed into the rocks, making it appear higher. Once I was certain that the sun had shown its best, I clambered back up to cliff path feeling cold but confident that I had something that at least came close to the original photograph.
Back in the warm and reviewing my photos from the day, I was quite impressed at how close I had come to the original composition. Due to the tightness of the 56mm lens, I’d lost a little space on the top edge, but I felt it was a reasonable sacrifice in favour of keeping enough room at the bottom, where much of the picture’s interesting detail was. None of my frames had quite the same texture in the water as the original and the ones that were close just didn’t feel quite right, either being too washed out, or having too ‘fussy’ detail. Instead I opted for drama and chose the frame that I felt best suited the scene, as you can see at the top of this page. Working from the raw file, I used the same black and white film simulation as I had in-camera as a base for my edit. There was a lot of dodging and burning involved, but by using luminosity masks and blend modes which would have been a mystery to me when I’d shot the original photo, I was able to complete the image far quicker than I would have done back then. Throughout the edit it was essential to keep the shadows and highlights from clipping, which would have lost important details but the most important thing to me, was to reproduce that inky-darkness in the unbroken water, which was achieved by carefully painting a darkening blend-mode through luminosity masks.
I’m happy with the result. It’s not exactly the same picture, but it was never meant to be. What do you think - was it a worthwhile exercise? I’m sorry I don’t have a better-quality original for you to compare to, but it’s amazing I even have this! Please let me know your thoughts in the comments below.
Please help me get seen
Thank you for taking the time to view this page. Please feel free to leave a reply below and if you like what you've seen, you can do me a huge favour by sharing this page using the buttons below.

